Welcome to Moksh Tubes & Fittings LLP

Monday - friday : 8:00 AM to 7:00 Pm

Stainless Steel Pipe Installation

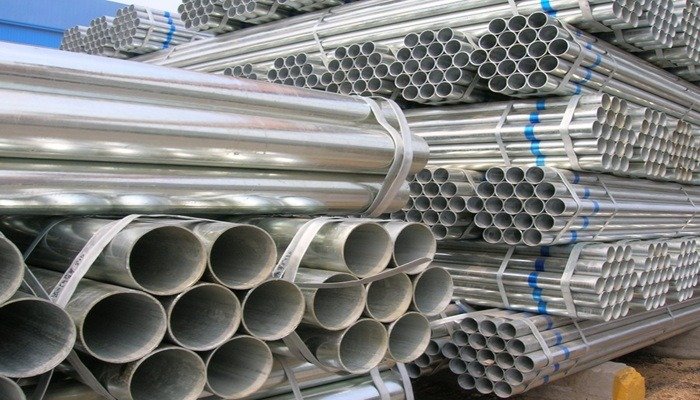
Stainless Steel Pipe Installation: Step by Step Guide

Choosing high quality stainless steel pipes for your project is an excellent first step toward building a durable, long lasting system. However, the superior qualities of the material can be completely undermined by improper installation. A flawless installation is critical to ensure the longevity, safety, and leak free performance of any piping system, from industrial process lines to architectural plumbing.

Even small mistakes during installation can lead to big problems down the road, including leaks, corrosion at connection points, and even system failure. This guide provides a clear, step by step process for installing stainless steel pipes correctly. By covering everything from preparation and tools to joining methods and final inspection, you can ensure your project is a success from the ground up.

The Importance of Proper Installation

A properly installed stainless steel piping system guarantees performance and safety. It ensures that joints are secure, flow is unobstructed, and the material's natural corrosion resistance is not compromised. Taking the time to follow best practices prevents costly rework, minimizes downtime, and protects the integrity of the entire system for its full service life.

Step 1: Preparation and Planning

Before you make a single cut, thorough preparation is essential. A well laid plan prevents mistakes and ensures you have everything you need on hand.

Review Your Schematics

Carefully study the piping and instrumentation diagrams (P&IDs) or architectural drawings. Understand the layout, required pipe sizes, fitting types, and the location of all valves and instruments. Double check all measurements to create an accurate cut list.

Gather the Right Tools and Materials

Using the correct tools is non negotiable for a professional installation. Using tools meant for carbon steel can lead to cross contamination and rust.

Essential Tools & Equipment:

  • Safety Gear: Always wear safety glasses, gloves, and appropriate protective clothing.
  • Measuring Tools: Tape measure, level, and square.
  • Cutting Tools: A dedicated pipe cutter with a stainless steel wheel, a bandsaw, or a cold-cutting saw. Avoid abrasive wheel saws which can generate excessive heat and contaminate the steel.
  • Deburring Tool: A hand deburrer or file specifically for stainless steel.
  • Joining Equipment: Depending on the method, you will need a TIG welder, press-fit tool, or appropriate wrenches for threaded fittings.
  • Cleaning Supplies: Isopropyl alcohol and clean, lint free cloths.

Materials Checklist:

  • Certified stainless steel pipes of the correct grade and schedule.
  • Matching stainless steel fittings (elbows, tees, flanges, etc.).
  • Appropriate gaskets, sealant, or filler metal for your chosen joining method.
  • Pipe supports and hangers.

Inspect Your Materials

Before you begin, inspect all pipes and fittings for any signs of damage that may have occurred during shipping or handling. Verify that the material grades and sizes match your project specifications and that you have the correct Mill Test Reports (MTRs).

Step 2: Cutting the Pipes

A clean, square cut is the foundation of a good joint. A crooked or rough cut will make it difficult to achieve a leak proof seal.

Measure and Mark: Accurately measure the required length and mark the pipe clearly. Use a pipe wrap or square to ensure your cutting line is perfectly perpendicular to the pipe's length.

Make the Cut: Use your dedicated stainless steel cutting tool.

  • Pipe Cutter: This is ideal for smaller diameter pipes, providing a clean and square cut with minimal effort.
  • Bandsaw: For larger diameters, a bandsaw with a blade suitable for stainless steel works well. Use a slow, steady feed rate.

Deburr the Edge: After cutting, the inside and outside edges of the pipe will have a small burr. Use a deburring tool or a fine file to remove this burr completely. A smooth, clean edge is crucial for proper fitting and flow.

Step 3: Cleaning and Preparation for Joining

Contamination is the enemy of a strong, corrosion resistant joint. Any oil, grease, or dirt left on the pipe can compromise the joining process.

  • Wipe Down: Thoroughly clean the inside and outside of the pipe ends (about 2 inches back) with isopropyl alcohol and a lint free cloth.
  • Prepare Fittings: Clean the corresponding fittings in the same manner.
  • Dry Fit: Before applying any sealant or making a permanent connection, perform a "dry fit" to ensure the pipe and fitting go together smoothly and the alignment is correct.

Step 4: Choosing and Executing a Joining Method

There are several methods for joining stainless steel pipes. The best choice depends on the application, pressure requirements, and industry standards.

Method A: Welding (TIG)

Tungsten Inert Gas (TIG) welding is the most common method for high pressure and high purity industrial applications. It creates a strong, permanent, and leak-proof joint.

  • Fit Up: Align the pipe and fitting, ensuring the gap is consistent.
  • Tack Weld: Apply several small tack welds around the joint to hold it in place.
  • Purge the Pipe: To prevent oxidation on the inside of the weld (sugaring), the pipe must be purged with an inert gas like argon.
  • Complete the Weld: Perform the final weld pass around the joint, ensuring full penetration.
  • Post Weld Cleaning: After the weld cools, it must be cleaned and often passivated to restore full corrosion resistance.

Method B: Press-Fit Systems

Press-fit systems are a popular modern alternative to welding, especially for plumbing, HVAC, and fire protection. They are fast, clean, and require no open flame.

  • Mark Insertion Depth: Use the manufacturer's gauge to mark the correct insertion depth on the pipe.
  • Insert the Pipe: Slide the pipe into the fitting until it reaches the marked depth. The fitting contains a pre installed O ring (EPDM, FKM, etc.) that creates the seal.
  • Press the Joint: Place the jaws of the press tool over the bead of the fitting and press the trigger. The tool mechanically crimps the fitting onto the pipe, creating a permanent, watertight seal.

Method C: Threaded Fittings

For lower pressure applications and systems that may require disassembly, threaded fittings are a viable option.

  • Apply Sealant: Apply a high quality thread sealant or PTFE tape designed for stainless steel to the male threads.
  • Tighten the Fitting: Hand tighten the fitting first, then use two wrenches one to hold the pipe or opposing fitting (bucking) and one to tighten the joint. Tighten about 1-2 full turns past hand tight, being careful not to over tighten, which can damage the threads.

Step 5: System Support and Final Inspection

Proper support is crucial to prevent stress on the joints and sagging over the long term.

  • Install Supports: Install pipe hangers and supports according to the project specifications. Spacing will depend on the pipe diameter and weight.
  • Visual Inspection: Conduct a thorough visual inspection of every joint. Look for any signs of misalignment, incomplete welds, or damage.
  • Pressure Testing: The final step is to test the system for leaks. This is typically done hydrostatically (with water) or pneumatically (with air or nitrogen), depending on industry standards. Pressurize the system to the specified test pressure and hold it for the required duration, checking every joint for leaks.

Your Investment in Quality

Properly installing stainless steel pipes is a skill that pays dividends in system reliability and longevity. By following these steps and paying close attention to detail, you ensure that you get the full benefit of this exceptional material. This methodical approach protects your investment and delivers a high performance system built to last.

Looking for top tier stainless steel pipes and fittings for your next installation? Mokshtubes provides a comprehensive inventory of certified, high quality products designed for performance and reliability. Contact our team today to get the right materials for a flawless installation.

Contact Us

AT Moksh Tubes & Fittings LLP, we’re dedicated to making your purchases seamless offering expert advice, a wide inventory of certified products, and global support for every order, large or small.

Get in Touch